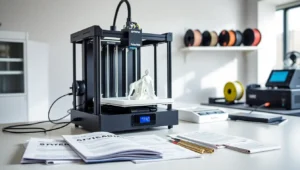
Imagine sculpting a masterpiece, only to find that it does a dramatic pirouette off the printing bed halfway through. Frustrating, right? That’s why raft 3D printing has become a game changer for hobbyists and professionals alike. It acts like a trusty sidekick for your 3D prints, providing stability and enhancing adhesion. In this text, we’ll navigate the waters of raft 3D printing together, ensuring your next project doesn’t take a dive. Let’s immerse.
What Is Raft 3D Printing?
Raft 3D printing is a technique where a support layer, known as a raft, is created beneath the main object during the printing process. This raft usually consists of several layers of material that help to stabilize the print and improve adhesion to the print bed. Think of it as a sturdy foundation for a house: without it, the structure might tumble or lean excessively. The raft is printed first and acts as an intermediary between the model and the build surface, ensuring that the object sticks well and that there are minimal deformities during printing.
The raft often comes with its own perks. Depending on the printer settings and materials used, it can vary in thickness and number of layers. Generally, it’s printed with a wider gap than the actual model’s base, allowing for easier removal once printing concludes. This leads to cleaner finishes and helps to mitigate issues like warping and lifting.
Summarizing, raft 3D printing plays a crucial role in achieving successful prints, especially for complex geometries or when working with materials prone to warping. This technique not only enhances the stability of the prints but also opens the door to more intricate projects.
Benefits of Using Rafts in 3D Printing
Utilizing rafts in 3D printing brings a treasure trove of benefits, making it a common choice among many makers. Here’s a closer look at why rafts can be so advantageous:
Enhanced Adhesion
One of the standout benefits of a raft is the improved adhesion it provides. Prints can sometimes be challenging to keep in place, particularly when dealing with materials that have a tendency to warp. A raft creates a larger surface area for the model to stick to, effectively anchoring it down during the printing process.
Reduced Warping
Warpage is an age-old nemesis in the world of 3D printing. Rafts offer a protective layer that can reduce temperature fluctuations on the model during printing. This is especially beneficial for filament types, such as ABS, which are notorious for warping due to rapid cooling.
Easier Removal
After the printing is complete, removing an object directly from the print bed can sometimes result in damage. Rafts make it easier to detach models, as they are designed to peel away cleanly from the initial layers. They provide a buffer that saves you from potential heartbreak over a shattered print.
Better Print Quality
With added stability and a controlled environment, rafts contribute to an overall increase in print quality. They help to ensure that first layers adhere correctly and that detail is preserved throughout the print. The result? Snag-free, smooth surfaces and well-defined details.
In short, rafts bring a suite of benefits that can transform one’s printing experience, making them an invaluable tool in the toolkit for anyone looking to elevate their 3D printing game.
How to Create and Customize Rafts
Creating and customizing rafts is a straightforward process that can be tailored to suit individual project needs. Here are the key steps involved:
Step 1: Choose Your Slicing Software
First, you’ll need slicing software that supports rafts. Popular choices like Cura, PrusaSlicer, and Simplify3D allow users to specify raft settings.
Step 2: Adjust Raft Settings
In your slicing software, navigate to the raft settings. Here, you can usually modify parameters like:
- Raft thickness: Increasing thickness can improve stability but will use additional material.
- Raft offset: This controls the distance between the raft and the model, influencing how easily the raft detaches post-print.
- Number of layers: More layers provide a sturdier raft but require additional print time.
Step 3: Prepare the Print Bed
Before printing, ensure your print bed is clean and level. This allows for optimal adhesion and prevents the raft from adhering unevenly.
Step 4: Start Printing
Once settings are adjusted, hit “print” and let your machine work its magic. Monitor the first few layers to confirm they’re adhering well.
Step 5: Cleanup Post-Print
After printing, when the print has cooled, carefully remove the raft. Use tools like a spatula or your hands to guide the separation gently, avoiding damage to the model.
Customizing rafts might require some trial and error, but adjusting these settings can significantly enhance the success of your prints, ensuring both stability and a clean outcome.
Common Issues with Rafts and Their Solutions
Even though their benefits, using rafts isn’t always a smooth sail. Here’s a breakdown of common issues encountered along with their potential solutions:
Issue 1: Raft Adhesion Problems
Sometimes the raft may not adhere well to the print bed, leading to a failed print.
Solution: Ensure that the print bed is clean and level. Experimenting with different bed adhesives, such as glue sticks, hairspray, or specialized adhesives, can also help improve adhesion.
Issue 2: Damaged Raft During Removal
In some instances, the raft can become entangled or damaged during removal.
Solution: Use a thin spatula for careful separation. If necessary, try heating the bed slightly before removal to soften the raft material, making it easier to peel away.
Issue 3: Raft Speeds Affecting Print Time
Adjusting raft settings can sometimes lead to increased print times, which can be frustrating.
Solution: Optimize raft settings for speed without compromising quality. Experiment with raft thickness or layer height to find the right balance between speed and stability.
Addressing these common issues isn’t just about troubleshooting: it’s about understanding the nuances of raft printing. With practice, many of these challenges can be expertly navigated.
Advanced Techniques for Raft Optimization
For those looking to push the envelope of their raft 3D printing, a few advanced techniques can help optimize the process further:
Technique 1: Adaptive Raft Height
Instead of using a fixed height for the entire raft, consider implementing varying heights based on the complexity of the model. Thicker areas may require more layers for support, while simpler sections can use less material.
Technique 2: Custom Raft Designs
Some slicing software allows users to create customized raft designs that cater to specific print needs. Experiment with patterns that provide optimal support while minimizing material usage, think geometry.
Technique 3: Material Choice
Choosing the right material for the raft can significantly affect its performance. Experimenting with different filament types can yield different results: for example, using a more flexible material can make removal easier.
Technique 4: Monitoring Print Temperature
Temperature control is critical for the success of rafts. Printing in an enclosure or using a heated bed can help reduce warping and enhance the adhesion of the raft.
By integrating these advanced techniques, 3D printing enthusiasts can not only enhance the performance of their rafts but contribute to higher-quality prints and a more enjoyable printing experience.